


Chapters

How to save yourself days of work when deploying your React Native app to test? Learn how we do it.
“Developing mobile applications” - it sounds really nice. You may think that this is the easiest task because there are so many applications everywhere but… It’s not that simple. The journey that the applications had to take to appear in the stores is long and hard.
React Native application recipe
To develop and finally deploy React Native applications you have to make a few steps. Think about it like a dish or a cake you want to bake. The end of development is amazing news, but seeing the application in the store is the icing on the cake. So the question is… Where to start and what to do? :)
Prepare the space and tools
Firstly, prepare a repository on GitHub. Think about app icons - it could be anything (we will need it later to deploy).
Make cake base
This is the moment when you initialize your React Native application. Check if it's working on Android and iOS simulators. You can also delete default app content and instead put something as simple as a button.
Add ingredients
Add more code. Probably you would like to add some libraries, prepare navigation, maybe basic components or views, and implement new functionalities. This is the step where you “just” develop your app.
Time to bake
Finally! You've finished doing some range of functionalities and it's time to release the app. This is the last step in creating an application, but probably the most demanding one. It is not enough to press one button and leave it for some time - not yet, but we'll get to that...
Every application that will be released must be properly configured - signed.
You have to do that in a different way for Android and iOS. Packages, keystores, certificates, provisioning profiles, Google Developer Account, Apple Developer Account, Google Play internal tests, Testflight… You need to set up these things “just” to deploy your app to test through stores.
Application deployment process is really well documented but it’s still long, hard, and… you have to repeat it with every release. Sounds terrible? For me too, but there is a solution for this!
What to do to make React Native application deployment less painful?
When you develop a mobile application it’s probably not the only part of the system. You also need a backend and maybe a frontend too. These three projects can share some ideas, interfaces, and so on. To reduce the amount of duplications you can put them in monorepo.
You have your project and detailed instructions, your recipe, so you know what to do at each step. You use it whenever you need to deploy a new version of your application. But… why manually execute a set of commands (that don't change), and do it every time, when this process can be automated?
There are many possibilities and different tools to help develop and automate the deployment process. I’ve chosen Nx monorepo, Fastlane and Github Actions.
Nx
Nx is a build system that helps create monorepo. It also supports React Native so you can use the nx command to initialize such mobile applications.
Fastlane
Fastlane is a tool that makes building apps much easier. The whole process of code signing is included in a few lines of script. After preparing such script you can use one of the fastlane commands to publish your application to Google internal tests for Android or to Testflight for Apple. Next thing is increasing version number and guess what? Yes, you can do it with Fastlane and even push commit to your Github repo. Of course, firstly you have to set up a few things, but you have to do it only once.
Github Actions
Github Actions is a tool that automates your build. If you want to deploy an application after some event occurs Github Actions will be the solution. You can trigger workflow after a commit to a specific branch appears or pull request changes.
Take setting up a new project to the next level
We use the tools above and set up the project with automated deployment, then develop it, finally finish and everyone is happy. But… Next project is upcoming - let’s configure tools, add libraries and set up deployment pipelines once more. And we have to do it with every new application…
I’m sure that no one remembers all the configuration details so it can take ages. To reduce the amount of time needed to start a new project, at EL Passion, we use a generic template.
Long story short. We have an internal solution, Flounder, that has multiple applications inside - frontend, backend, mobile and some reusable modules. This project is constantly updated so we can run it and develop just like a normal project. We can also generate templates from it. Thanks to that, from templates with just one command we can initialize projects that have things like libraries, pipelines and basic components already set up. These newly generated projects have all the functionalities and modules that Flounder has.
Let’s get started with React Native project setup!
Firstly, let’s create a monorepo workspace, just like we did some time ago in Flounder:
npx create-nx-workspace your-workspace-name --preset=empty
Go inside workspace directory and add nx react-native package:
cd your-workspace-name
yarn add @nrwl/react-native --dev
The next step is to create a react native application:
npx nx g @nrwl/react-native:app your-app-name
The project structure should look like in the picture below. In the main directory you can see ‘apps’ - all ‘small’ projects that belong to workspace will be there.
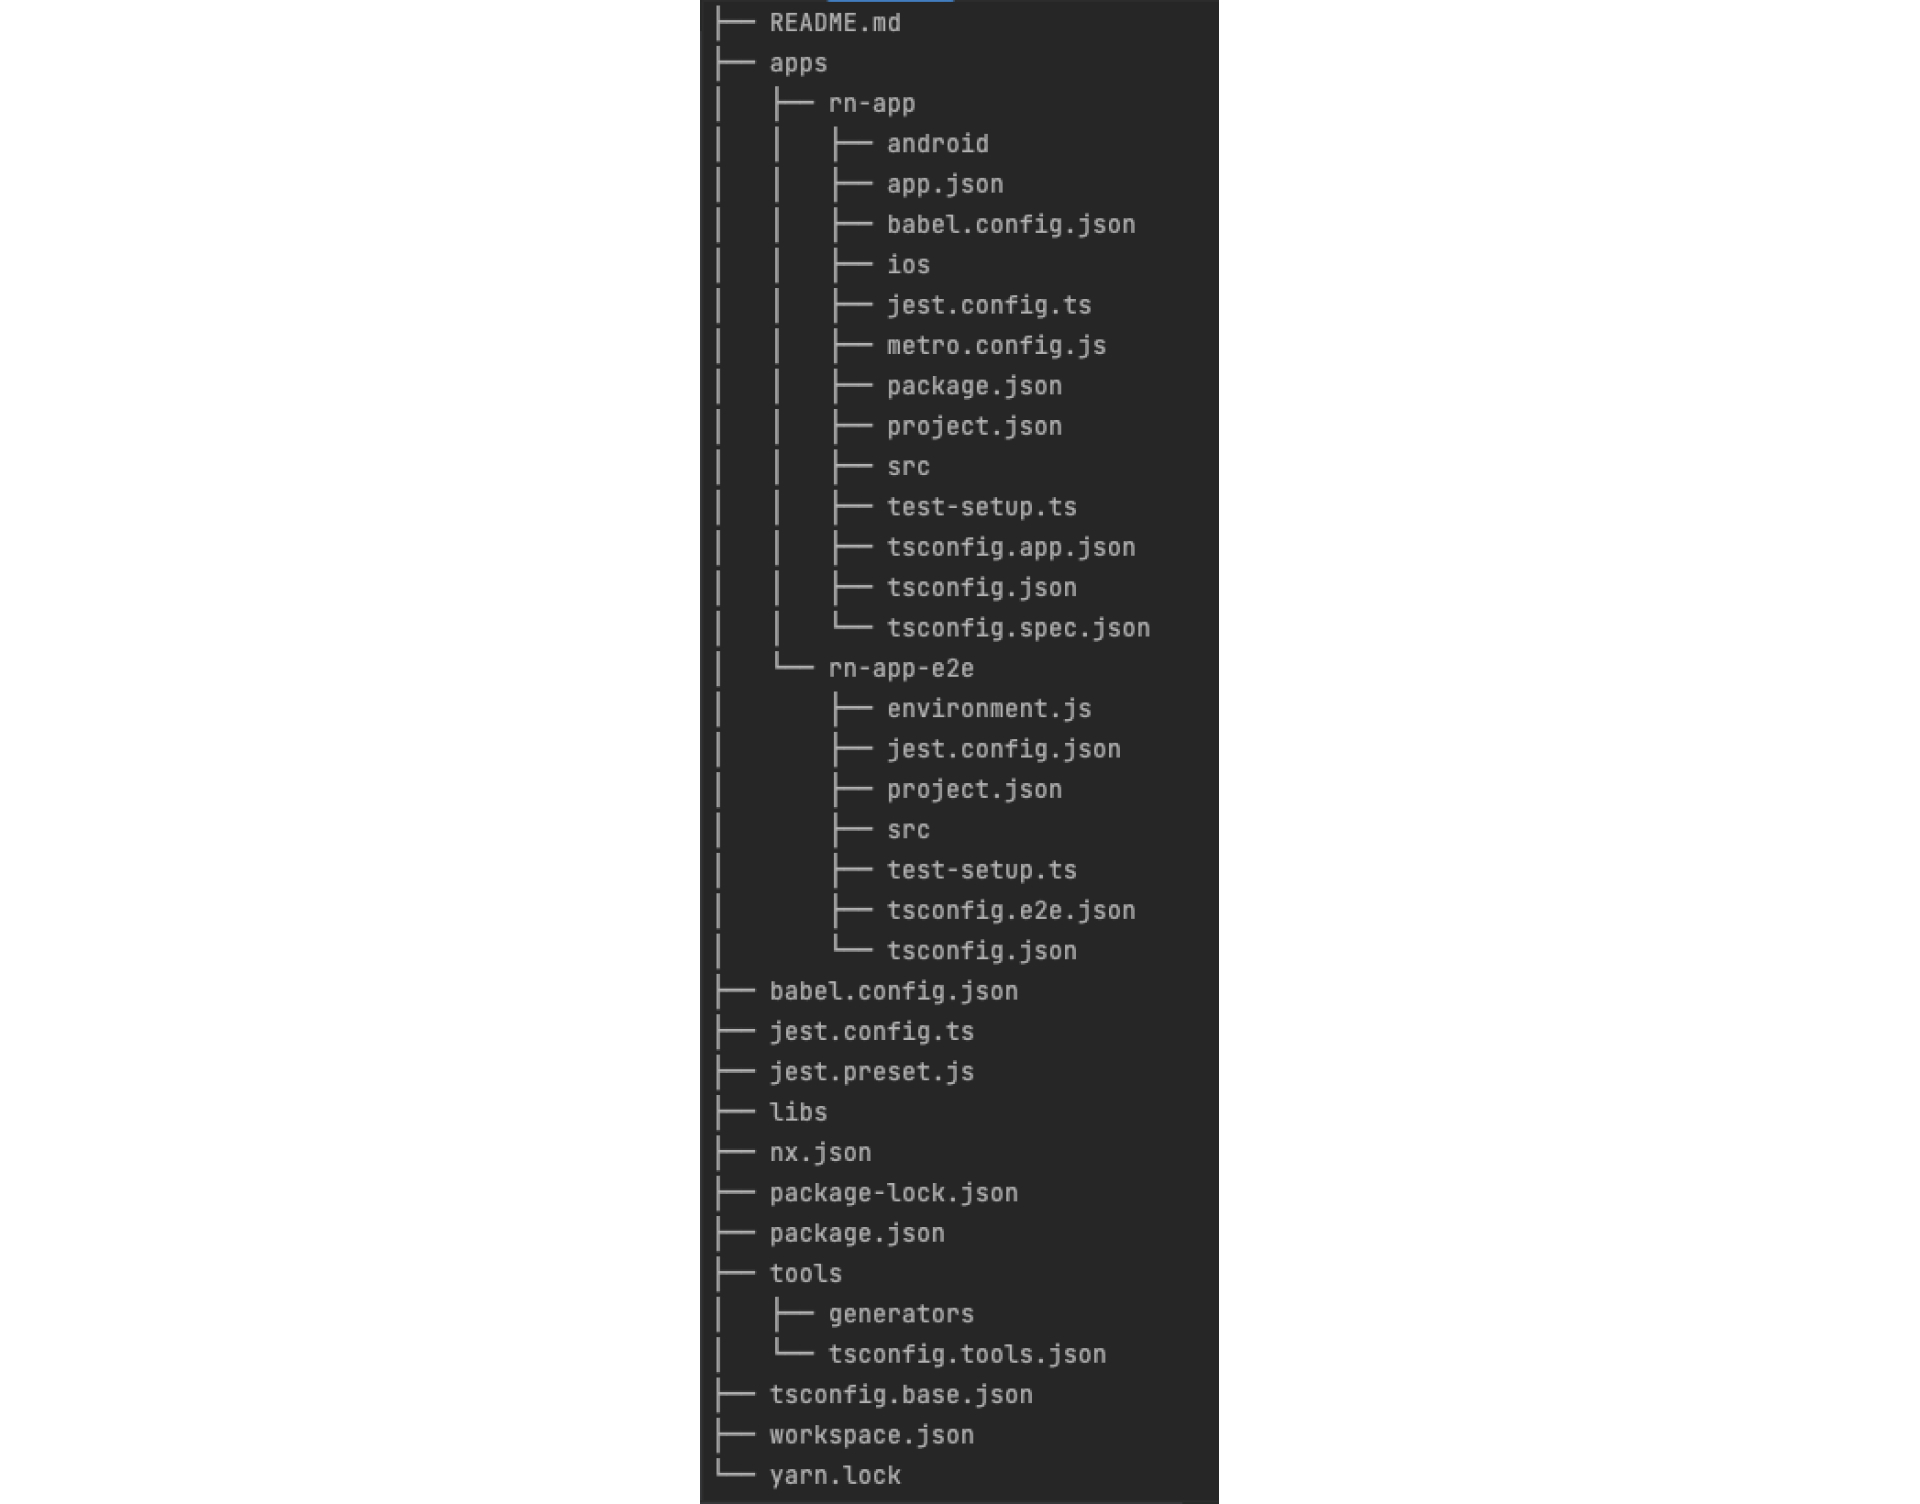 The project's directories structure
Now, you can try running your app on simulators.
Android:
npx nx run-android your-app-name
iOS:
npx nx run-ios your-app-name
It should look like this:
 Running application on simulators. On the left - Android 11 (Pixel 2), on the right - iOS 15.5 (iPhone 13)
Great, the first step is done! :) Now, you can change the default view and put a button in the middle of the screen. So, put some code inside apps/your-app-name/src/app/App.tsx
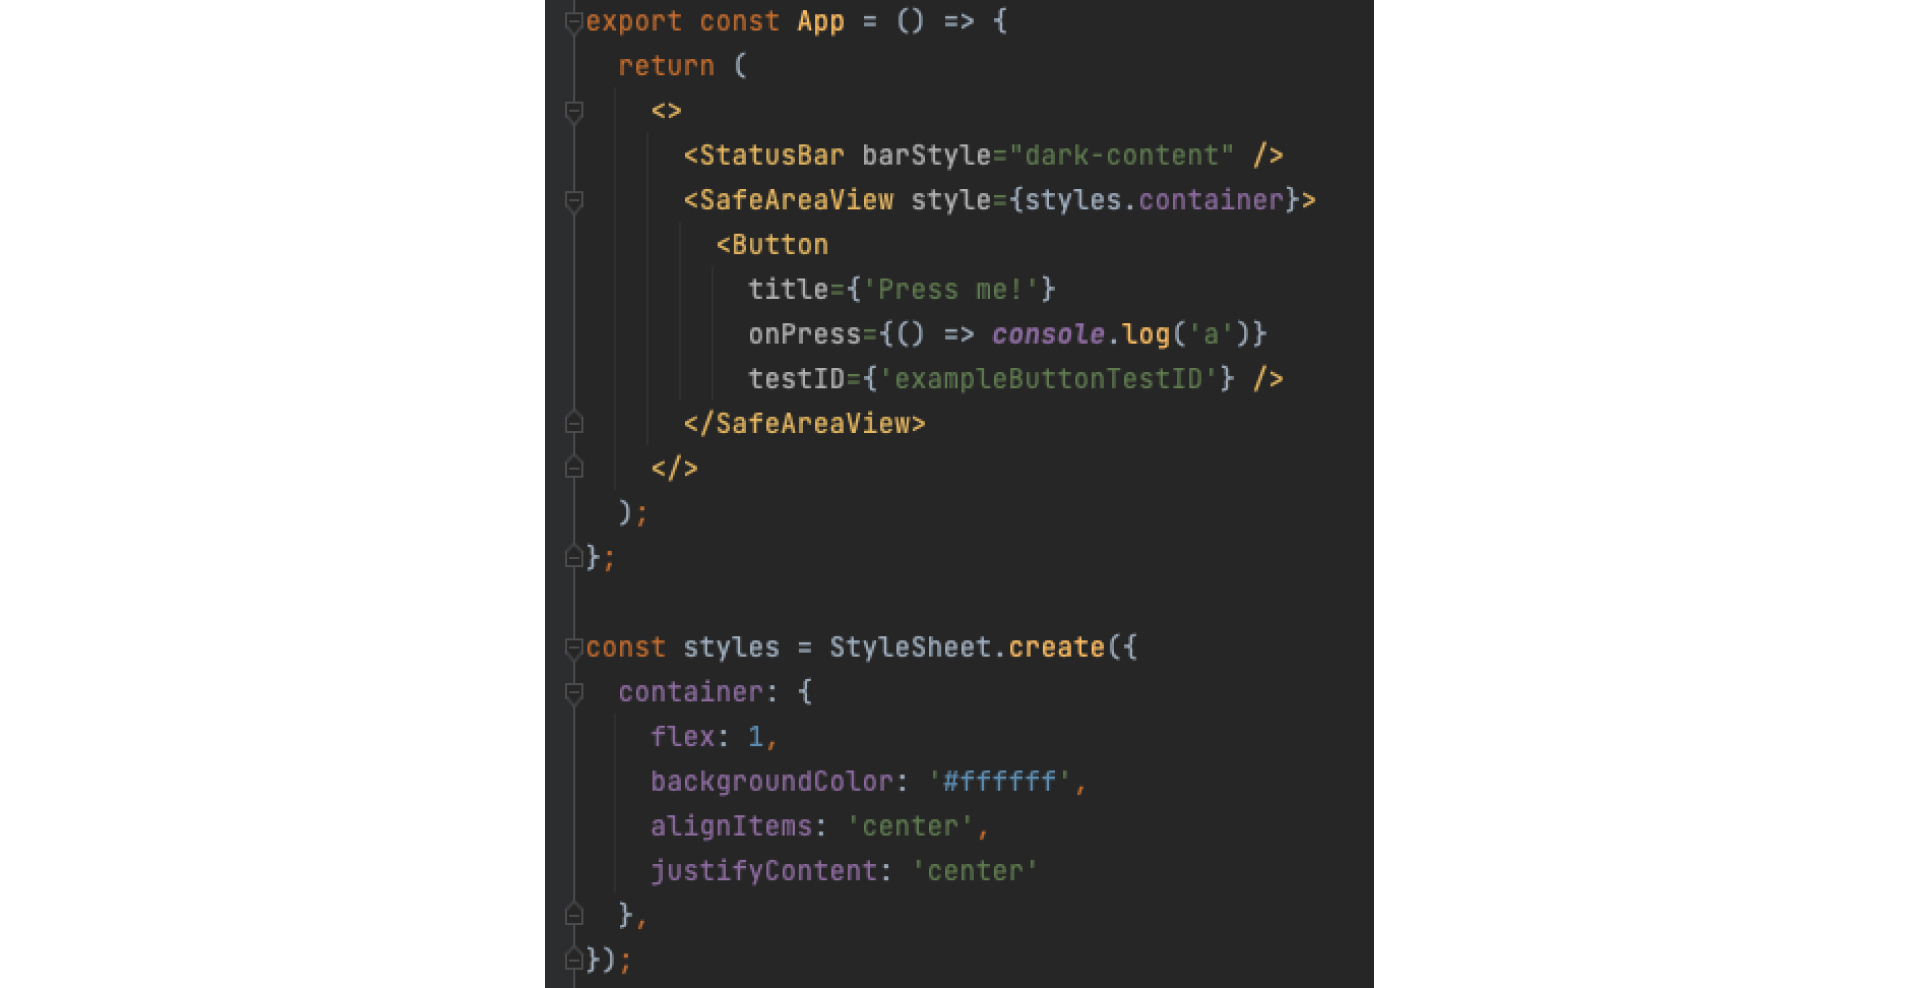 Basic app screen - apps/your-app-name/src/app/App.tsx
You may notice additional property added to the button component. Using the nx commands to generate the project, the react-native application was created. The great thing is that it has @testing-library/react-native linked by default so you can write tests immediately. ‘testID’ parameter is used to recognize components during testing.
Create a test
Inside apps/your-app-name/src/app there is a file App.spec.tsx that contains the default test. Test case is not gonna work right now because the application default view has already been changed. Let’s reorganize tests a little bit just to have everything in order. Delete file App.spec.tsx. Create a new directory called ‘test’ in your-app-name directory and a new file called App.test.tsx inside. Put code that tests app screen in it.

It’s just a simple test case that only checks if a button appears on the screen. If that part is ready - run test. Use the command below:
nx test your-app-name
It’s working!

Now it’s time to prepare the release build. The idea is to use Github Actions workflow to run tests and to use fastlane. Fastlane script will build an app and deploy it to test inside proper store.
Setup Fastlane to build and deploy a React Native application automatically
Application is working on Android and iOS, test is passed, so now it’s time to prepare release build. There are two solutions when fastlane comes to mind:
- add configuration for Android inside Android directory and for iOS inside iOS directory
- add one configuration file for both platforms
I chose the first approach because code signing and app building are different on both platforms and it's much clearer to divide configurations by platform.
Start with installing Fastlane - you can read more about basic setup here.
With Homebrew: brew install fastlane
or with RubyGems: sudo gem install fastlane
Setup Android - init fastlane
Go to android directory and initialize fastlane.
cd apps/your-app-name/android
fastlane init
You will be asked about:
- package name - the same as ‘package’ here
apps/your-app-name/android/app/src/main/AndroidManifest.xml - path to json secret file - right now leave it empty
- downloading existing metadata - skip it

Some information will pop up, just keep pressing enter until they're finished. Now you should see fastlane directory with two files inside:
- Fastfile - a place for lanes (sets of commands/actions) used for example for building and signing application
- Appfile - a place for fastlane configuration, it includes package name and path to json secret file
After deleting comments, the content of Fastfile should look like this.

And the content of Appfile should look like this.
Android Appfile default setup - apps/your-app-name/android/fastlane/Appfile
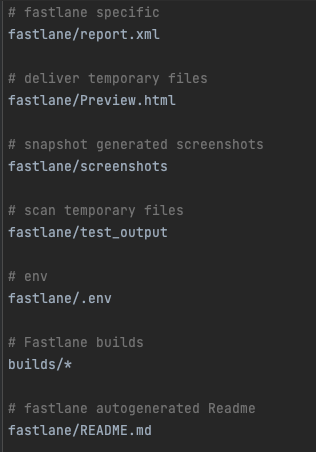
When building an application Fastlane will generate some files that should not be uploaded to the repository - so add the .gitignore file to the android directory.
Setup Android - generate keystore
Now, let’s generate a keystore file - it will be used to sign the release bundle. Go to the android/fastlane directory and run the command that creates the keystone.
cd fastlane
sudo keytool -genkey -v -keystore your-keystore-name.keystore -alias your-keystore-alias -keyalg RSA -keysize 2048 -validity 10000
You will be asked about the keystore password (don’t forget it!), first name, lasta name, organization etc. Fill every field, if everything is correct then confirm and you should have the keystore generated.

To build a release application you will need a keystore, password, alias. It’s not good practice to put it in a repository. Create a .env file that will be ignored by source control and put in it that data. Of course change ‘stars’ to true values.
 Android environment variables - apps/your-app-name/android/fastlane/.env
Android - application build
Let’s create an Android App Bundle - it will be needed later to create manually the first test release on Google Play store. Go to Fastfile and add some code just after default_platform command, delete the rest. First add actions that will execute before the selected lane to be sure that the script will run on the proper branch and code is up to date.

After that configure build lane so it will clean android gradle directory and build signed app bundle. Notice that previously added environment values are used here to sign the application.

Go to android directory and run fastlane command and just wait.
bundle exec fastlane android build
Wow, it’s working! :) You’ve built and signed your Android application with just one command!

Setup Android - generate Google Api Key
To deploy an application automatically to Google internal test api service key is needed. To generate that key you have to be a Google Developer Account owner - admin rights are not enough!
- Open Google Play Console
- In the menu on the left find Setup->API Access
- Find ‘Credentials’ section

- Press the button ‘Learn how to create service account’, window with instructions will appear - follow them

- In the Google Cloud Platform on the top there should be ‘Create service account’ button - click it.
‘Create service account’ button on Google Cloud Platform
- Enter required information - select ‘Service Account User’ role
- Save everything by pressing ‘Done’
- On the list with service account click on action icon (next to the account you’ve created) and select ‘Manage keys’
- Click on ‘Add key’ -> ‘Create new key’ -> select json as a type and press ‘Create’ - save file
- Go back to the Google Play Console. Press ‘Done’ and service accounts should refresh.
- Next to new account click ‘Grant access’, select ‘Admin’ permissions and click ‘Invite user’
- Get the created json file and put it inside project android directory
- To previously created .env file add one more value
ANDROID_API_KEY_FILE=your-api-key-file.json - Go to Appfile and change:
json_key_file("") to json_key_file("./" +ENV["ANDROID_API_KEY_FILE"])
Setup Android - create application on Google Play Console
Creating an application is another thing you must do on Google Play Console.
- Go to ‘All Apps’
- Click ‘Create app’ and enter the required information
- After the app is created you should see ‘Dashboard’ -> section ‘Set up your app’ -> go through every step (you’ll have to select the target group, add privacy policy etc.)
- Go to ‘Testing’ -> ‘Internal testing’ -> ‘Create new release’
- You have to upload previously generated Android App Bundle - you can find it here: apps/your-app-name/android/app/build/outputs/bundle/release/app-release.aab
- Add testers and click on ‘Review and roll out release’
- If something goes wrong follow the instructions next to your release - probably some information is missing
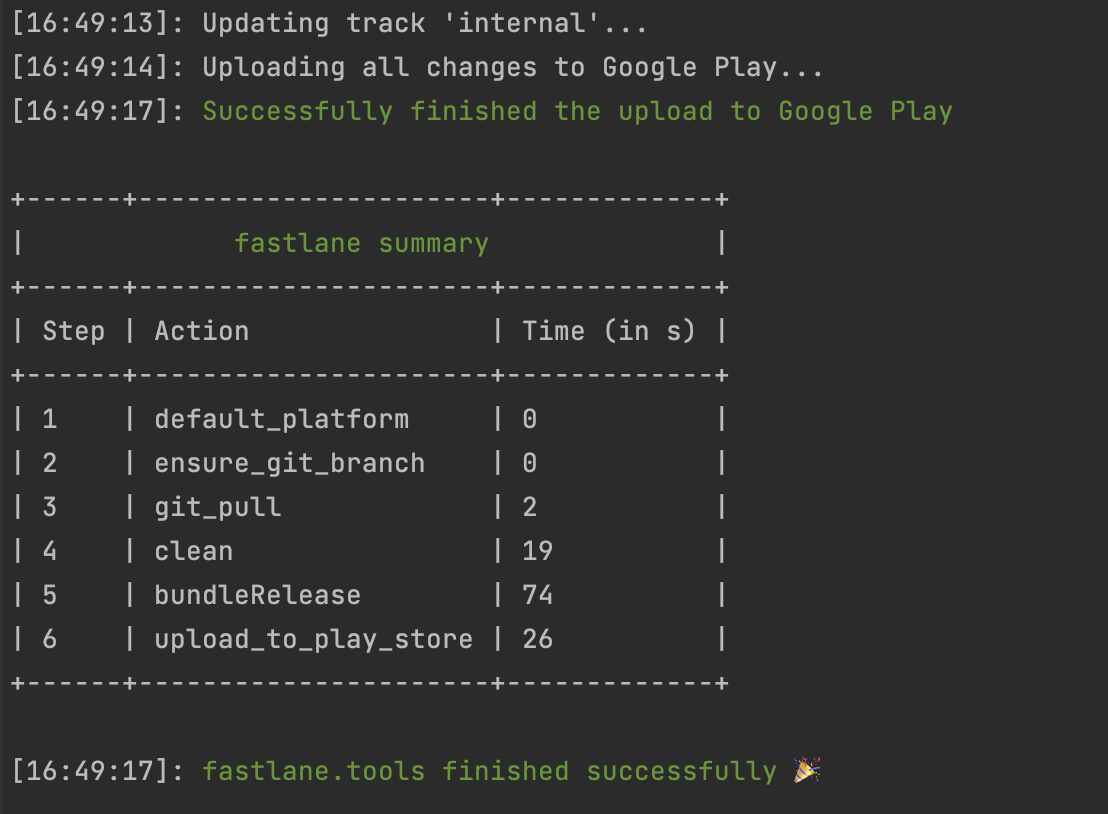
Setup Android - last step - run Fastlane to deploy app to store
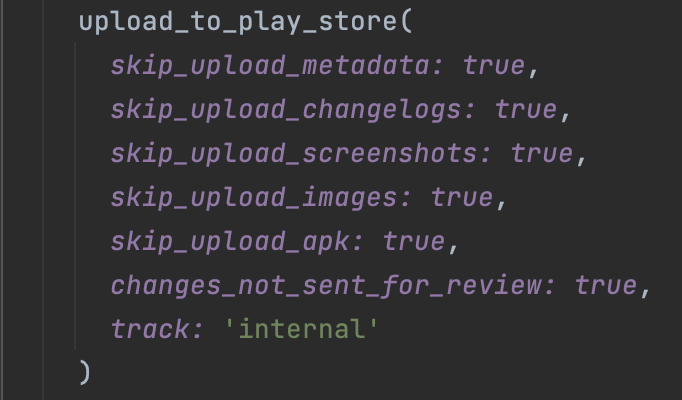
Add action to Fastfile that will upload Android App Bundle to Google Internal Test. After gradle task that creates bundle put upload_to_play_store command.
Inside android directory run fastlane:
bundle exec fastlane android build
Now the best part - green text that says ‘Successfully finished the upload to Google Play’! :)
Setup iOS - init fastlane
The Android part is working locally, let’s do the same for iOS. Start with initializing fastlane.
cd apps/your-app-name/ios
fastlane init
It will ask about the purpose of using fastlane - select ‘2 Automate Beta Distribution to Testflight’. After that, you have to enter the credentials of Apple Developer Account.

If your app doesn’t exist on Apple Developer Portal fastlane will ask if you want to add it automatically.

Select ‘y’ and enter your app name. Next, if your app doesn’t exist on App Store Connect fastlane will ask if you want to add it automatically. Like a moment ago, select ‘y’ and enter your app name.

After the process is finished you should see the fastlane directory with two files inside like it was with android - Fastfile and Appfile. To the ios directory add gitignore similar to the one in the android directory.

Setup iOS - prepare certificates
Now, let’s focus on codesigning. There are certificates and profiles that you have to share across your team so anybody could release an app. The solution is to use a fastlane match and store encrypted credentials for example on a private github repository.
So let’s start with that. First, you need to create an empty github repository and after that run the command to init match. As documentation says you should consider clearing your App Store certificates and profiles by using ‘fastlane match nuke’ - but be careful with that, it will revoke all certificates and profiles. The next step, whether you revoke everything or not, is initializing a fastlane match.
fastlane match init
You will be asked about storage mode - select ‘1 git' and enter the URL of previously created Github repository.
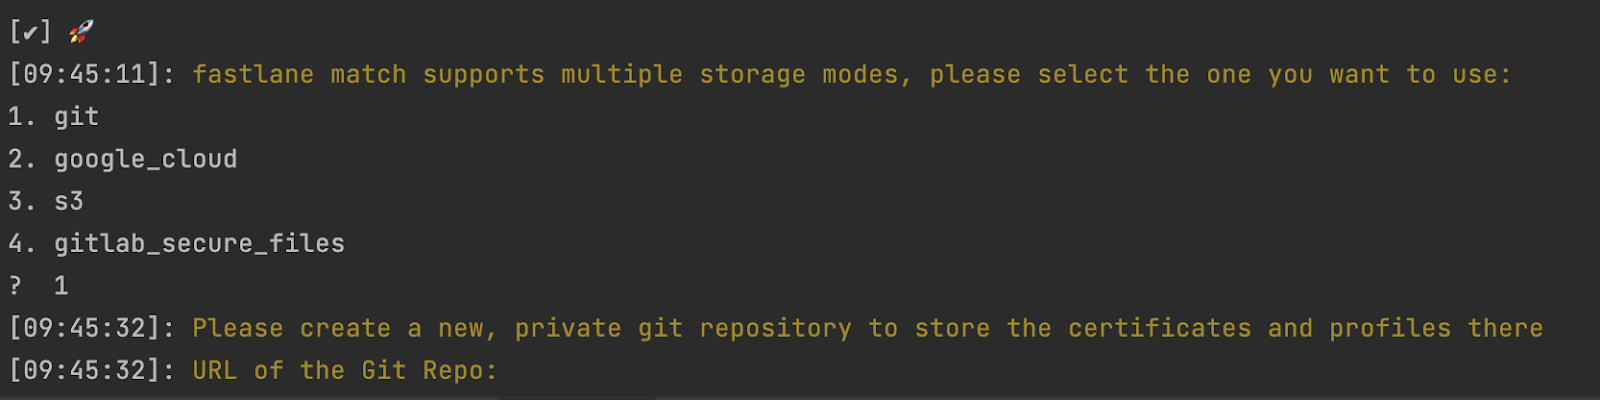
Press enter and it’s done!
Successfully created fastlane certificates setup
In the fastlane directory you should now see Matchfile with content like the one below.

Change type from “development” to “appstore” - it’s necessary when uploading to Testflight. Now, let’s add certificates and profiles to ‘App Store’ mode (Testflight).
fastlane match appstore
You will be asked for a password to encrypt certificates and profiles - don’t forget it!

Fastlane will also ask you to enter a password to the keychain. After the process is completed you can check your repository - it should look like this.

Setup iOS - application build
So firstly a few things to do in xCode:
Go to ‘Signing & Capabilities’ tab and in ‘Signing’ section disable ‘Automatically manage signing’.
Go to ‘Build settings’ tab and in ‘Signing’ section change ‘Code signing identity’ to the following.

Select your project and ‘Images’ - now you have to fill every square with icon in the required size

After that, create a .env file with values necessary to get certificates and build an application.

APPLE_ITC_TEAM, APPLE_TEAM_ID and APPLE_ID you can get from ios/fastlane/Appfile. The idea is to run fastlane on CI so a temporary keychain is necessary. GIT_AUTHORIZATION is required to get certificates from the repository while running pipeline on CI. MATCH_PASSWORD is the same as that you set when initializing a match repository.
Use added environment values inside Appfile.

Next, go to Fastfile and add some code just after the default_platform command, and delete the rest. Start with checking the git branch and updating the code.

Apple certificates and profiles are stored in other repository but while code signing they have to be in the device keychain. Add two functions - the first one will create a keychain and the second one will delete it (but only if such keychain exists).

Inside the platform code block create a new private lane that will make everything that is connected with certificates.
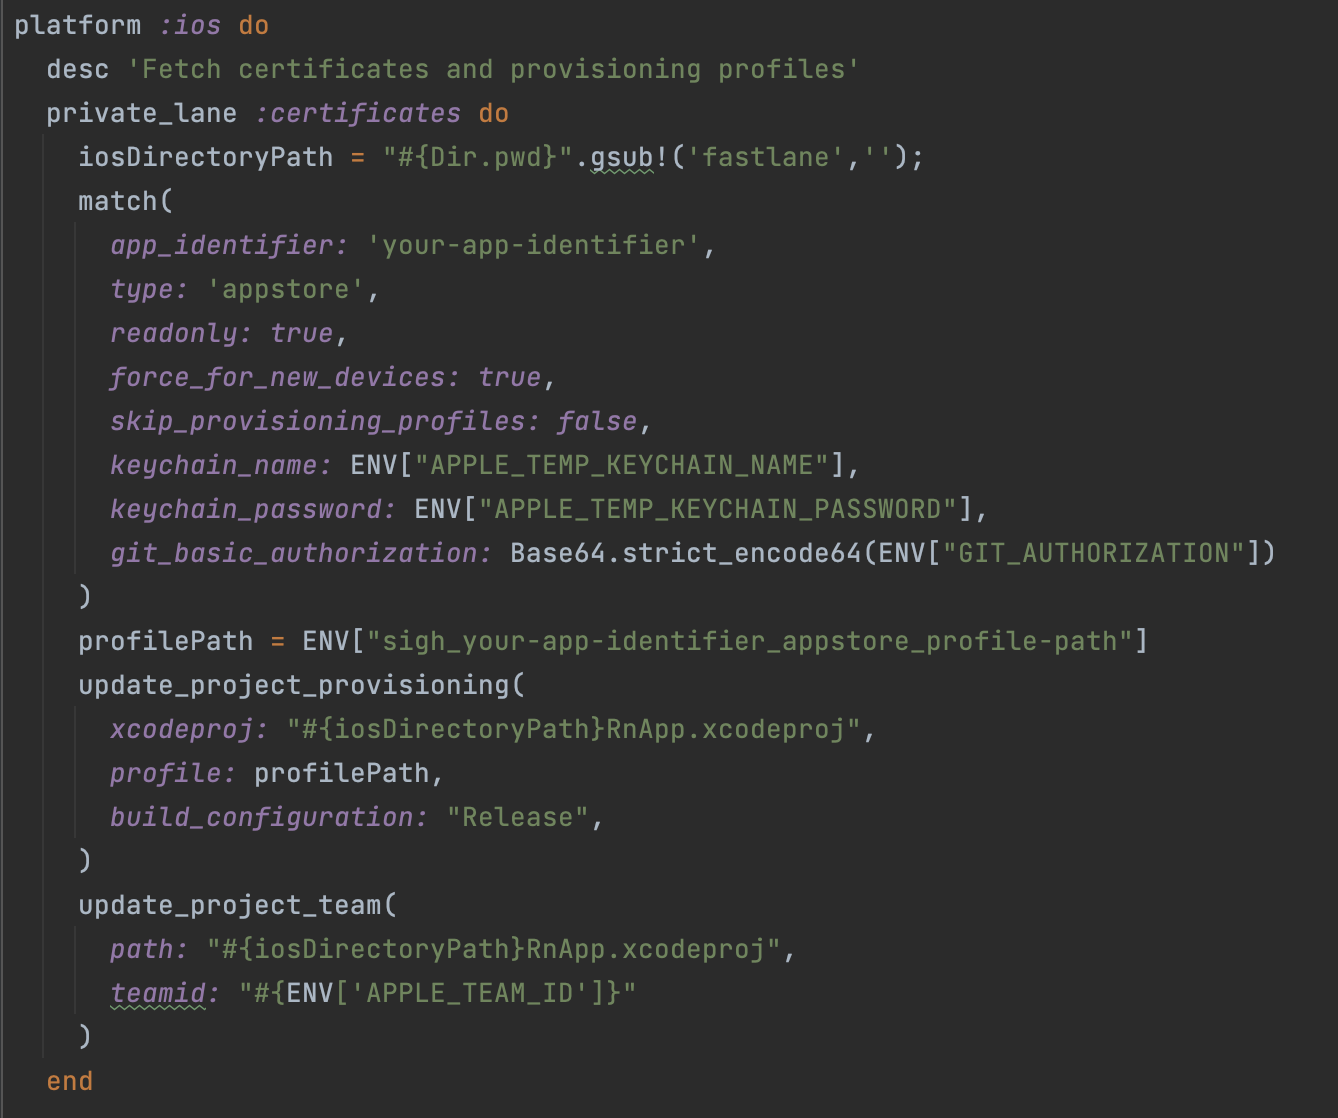
Commands used:
- match - it fetches certificates and provisioning profiles from repository, those data have to be saved into keychain so it is necessary to use keychain_name and keychain_password properties
- update_project_provisioning - it updates project provisioning settings
profilePath should look like this:
profilePath = ENV["sigh_com.app.something_appstore_profile-path"] - update_project_team - it updates xCode development team
Now, create a new lane that will: delete the existing keychain, create a new one, get certificates and save them to a temporary keychain, build an application and delete the created keychain.

It’s time to check if it’s working. Run the command below and wait as it finishes - it may take a few minutes.
bundle exec fastlane ios build
Congratulations, your iOS application have been generated! :)

Setup iOS - generate Apple Api Key
To upload an application to Tesflight Apple Api Key is necessary - with it you can ‘omit’ two factor authentication while running fastlane on CI. Let’s generate Apple API Key
- Open App Store Connect
- Select ‘Users and Access’
- Select ‘Keys’ tab
- Click ‘Generate API Key’ or ‘+’ if you have existing keys
- Enter name, select ‘Admin’ access and click ‘Generate’

- The new api key should appear on the list, click ‘Download API key’ and save it in ios/fastlane directory
- To faslane/.env add:
APPLE_API_KEY_FILE=api-file-name.p8
APPLE_API_ISSUER_ID=**********
APPLE_API_KEY_ID=********* - Get issuer id and key id from list on App Store Connect
Setup iOS - last step - run Fastlane to deploy app to store
Add an action to Fastfile that will create a connection to App Store Connect and use it in a second action that will push the application to Testflight. Put this code after the build_app command.

Try to execute full fastlane build
bundle exec fastlane ios build
Wow, a green comment has appeared - ‘Successfully uploaded package to App Store Connect. It might take a few minutes until it's visible online.’!
Setup Github Actions to run Fastlane command automatically and save your time
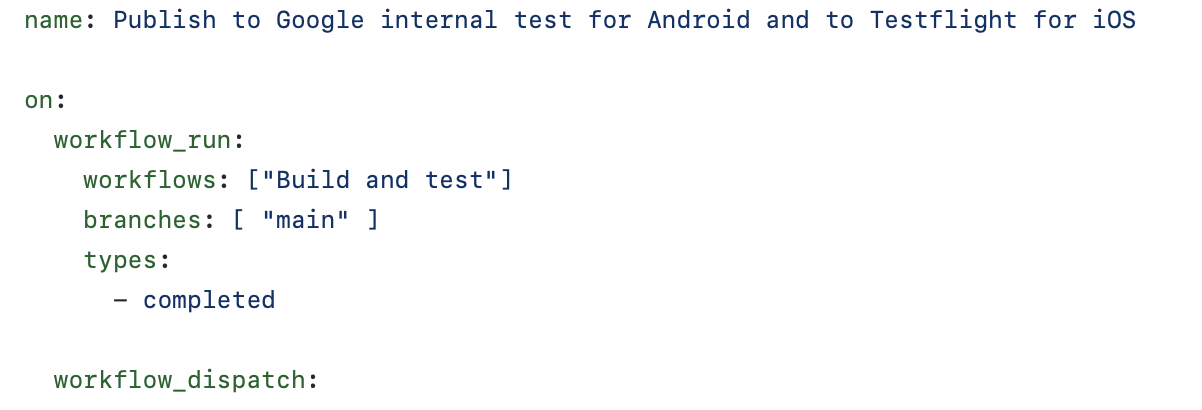
Now, let’s automate building and uploading the application. On Github go to your repository and select the ‘Actions’ tab. Click ‘Create new workflow’. Click ‘set up a workflow yourself’. The first workflow will run after a commit or pull request on main branch changes. It will install node_modules and then run tests.


Now, let’s add another workflow - it will start a fastlane script, the same one that it was earlier when running locally. Remember that the second workflow should run after testing is completed.
Now, define two jobs - one for Android and one for iOS. The beginning of them is similar - check-out repository, set node version, setup ruby, install fastlane, install main node_modules and node_modules inside react-native application. In Android there is an action to set java version and in iOS - to install pods.


Github Actions - Android job
Finish Android Github Action setup - create release.keystore file and API service key. Put the code below after installing node_modules. Change rn-setup to your-app-name.

The last action - running fastlane to build and upload an application to Google Internal test.

You may notice secrets and some .asc file extension - let’s start with files. You probably don’t want to store your keystores and api service keys on a repository. The idea is that you convert those files to base64 but with encryption and then put the generated string inside Github Action Secrets. So let’s convert file.
Go to android/fastlane directory and create an asc file. It will ask you to enter a passphrase - don’t forget it!
gpg -c --armor your-app-keystore.keystore
Now, you should have a new file with the .asc extension. Go to your Github repository and select Security->Secrets->Actions. Click the ‘New repository secret’.

Add the following secrets. Enter names and values.
First secret:
Name: ANDROID_RELEASE_KEYSTORE_PASSPHRASE
Value: the passphrase that you have set when creating keystore .asc file
Second secret:
Name: ANDROID_KEYSTORE_FILE
Value: keystore file name
Third secret:
Name: ANDROID_RELEASE_KEYSTORE
Value: content from your-app-keystore.keystore.asc
Now, do the same thing with your-google-api-key.json. Go to the android directory, create an asc file and add secrets to github (ANDROID_API_KEY_PASSPHRASE, ANDROID_API_KEY_FILE, ANDROID_API_KEY). After that, open the android/fastlane/.env file and add secrets based on those variables to GitHub.
Github Actions - iOS job
The Android part is done! Let’s go through iOS right now. Start with preparing Apple Service Key. Go to ios/fastlane, create an asc file based on your-apple-key.p8 and add secrets (APPLE_API_KEY_PASSPHRASE, APPLE_API_KEY_FILE and APPLE_API_KEY). Next, like with Android setup, open ios/fastlane/.env file and add secrets based on those variables to GitHub. Go to workflow on GitHub and add action that will create an apple key file based on secrets. Put this code below the pods installation.

The last action will create an .ipa application and upload it to Testflight.

All package.json scripts used on CI:
Package.json scripts - your-workspace-name/package.json
And the iOS setup is ready! Save workflow file - it will trigger workflow, wait as it finishes. The Android job should end in less than 15 minutes and the iOS part in about 30-40 minutes. After that time you should see something like this.

Congratulations! You have just built and uploaded your React Native application to tests on Google Play Store for Android and Testflight for iOS. But actually, it has built and deployed itself.
Summary
As you can see, configuring automatic deployment of mobile applications in React Native is tough, but after hard work with creating yourself a proper setup you’ll be thankful for such a process.
The greatest thing is that you have to configure the mechanism only once and after that, deploying a new version of an application is still a pleasure. In each and every case, everything is done by just pressing “enter” (by pushing commit to repository) or clicking a button (by merging pull requests).
And one more thing… Flounder includes a setup that builds and deploys Android application directly to Google Internal Test and iOS application to Testflight. With the project template, at EL Passion, we are saving ourselves days of work.
See also
- Making Your Project's Setup Easier and Cheaper with Generic Templates and Monorepos — The big guys are not wrong when they're using monorepos for their projects. Monorepos along with a generic template can make your project's setup faster (and cheaper). We're sharing our approach.
- TDD: The Game of Life — How to Code More Complicated Logic in TDD? — Programmers use TDD to take care of the quality and reliability of the code they create and to improve the process of its creation. However, they don't always pay attention to the fact that test writing itself can be more or less optimal.
You may also like

The Product Health Check: How to Find Performance Bottlenecks Before They Cost You Users
5 July 2026 • EL Passion

Staff Augmentation vs. Managed Teams: Which Model Saves You More on Long-Term Overhead
5 July 2026 • EL Passion
The Cost of Waiting: How Refactoring Your Legacy App Prevents Massive Technical Debt in 2026
31 May 2026 • EL Passion
We’re available for new projects.
