


Chapters

When building an app you usually separate frontend and backend. What if you combine these parts using the Next.js framework? Learn how to create a simple movie database platform in Next.js.
What’s Next.js?
Next.js is a framework created by Vercel. It is based on React and is used to build web applications. This solution gives the possibility to use server-side rendering and statically generated pages. The benefits of Next.js include high performance, SEO friendliness, and high-quality documentation. That's why it's used by some of the biggest companies like Twitch, HBO, and Vodafone.
Let’s get started with the Next.js project setup
Firstly, let’s create a basic project with Next.js:
npx create-next-app your-app-name
You should now see the generated Next.js project. Let’s check if it works. Go to your project directory and run the start application by using the command below.
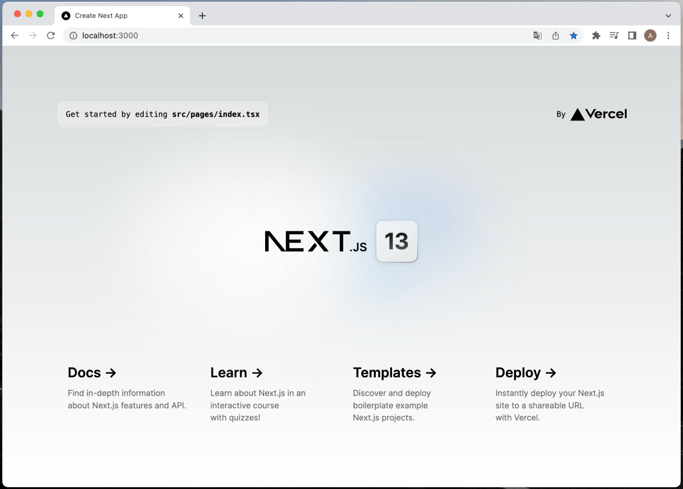
yarn dev
When you go to http://localhost:3000 you should see a kind of ‘Hello world’ page in Next.js.
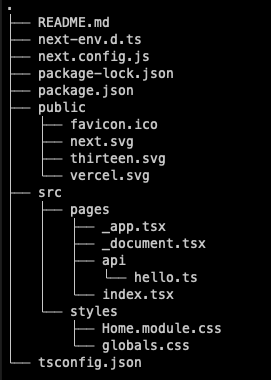
The project structure should look like in the picture below. ‘public’ directory contains static files that Next.js will serve automatically. ‘src’ is for ‘our files’ (files that we add to a project). In ‘pages’ there are files that Next.js uses for routing.
Configure ESlint and Prettier
This is the right moment if you want to add some configuration that will help you with code formatting and prevent you from making mistakes during implementation. For example, you can add ESlint and Prettier. There is a pretty good tutorial in Next.JS documentation. This step is optional.
Add baseUrl and do some cleaning
Firstly, we will get rid of unnecessary files. Delete src/pages/api directory, src/pages/_documents.tsx and src/styles/Home.module.css files.
In the main directory in tsconfig.json inside “compilerOptions” scope we could add param:
"baseUrl": "./src"
Thanks to that, later you can use shorter imports, like ‘styles’ instead of ‘../../styles’.
Go to pages/_app.tsx. This file contains code that is global for our application. Change styles import from
import '@/styles/globals.css';
to
import 'styles/globals.css';
Now go to the src/pages/index.tsx file - this is our home screen. Delete the whole boilerplate and leave only one text ‘Filmweb APP’.
Add tailwind for styling
Everyone wants fancy applications. You have many possibilities to make your application look really nice. Adding styling is totally optional, but… you can use Tailwind for example.
Prepare the Airtable database
Airtable is a cloud service that looks very similar to Excel or Google Sheets. Under the hood, it is a relational database. Many people just hear the word "database" and say that it's difficult, and that they don't know enough to create it. Airtable helps you create simple databases with an intuitive GUI that you can share with your teammates. Plus, there is a free plan available.
Sign up and prepare the database
Our application will be using the Airtable database, so before adding views, etc. you have to create an account on the Airtable platform.
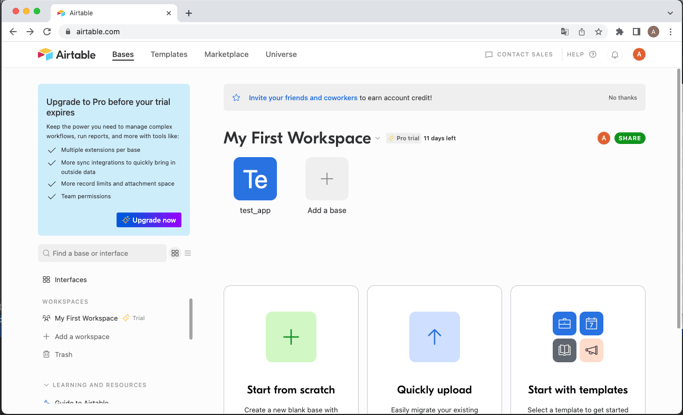
After your sign up, you can prepare a database. On your Airtable dashboard, you should see a view similar to the one in the picture below. Click on the “Add a base”
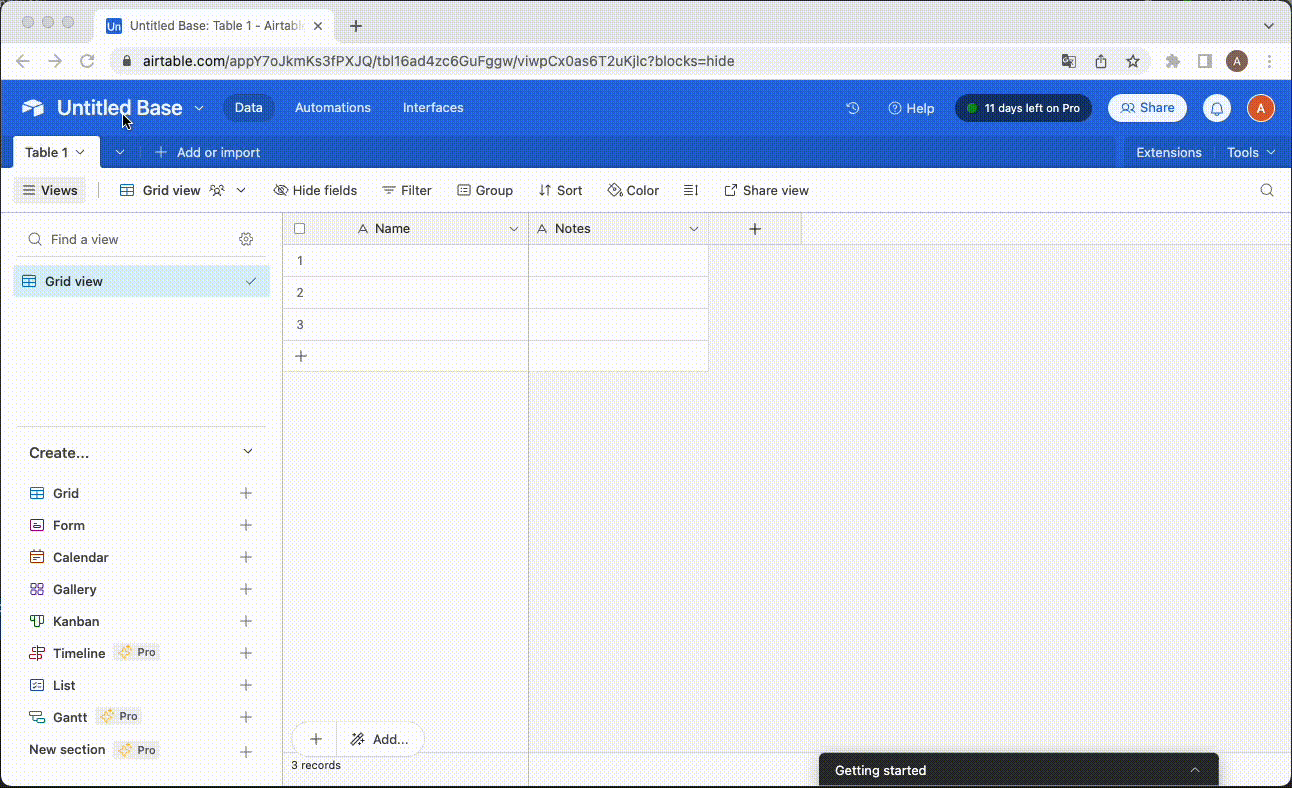
Firstly, let’s name this database “iMDB_APP” and set the table name to “movies”. Next, edit columns by double-clicking on their names or by using the right mouse button.
You can add a new column by pressing “+” next to the last column name or delete by clicking the right mouse button. We need the following columns:
- id - autonumber
- title - single-line text
- description - long text
- category - single select with options like comedy and fantasy. You can add more options if you want, but probably the better way would be to add a different table for categories - we won’t do that in this tutorial.
- likesAmount - number with an integer format
- createdAt - created time with 24-hour time format (it will be added automatically when adding a new record)
- updatedAt - last modified time with 24-hour time format (it will be updated automatically with every record update)
After creating these columns, you can add a few movies to your table, to have something that you can show in the application. Be sure to put at least three likes to at least one movie, we will need it later.
We need a database identifier so select “Help” and then “API documentation”. You should see something like “The ID of this base is …” and copy this ID. Create an env.local file in the main directory of the project and put:
AIRTABLE_DB=your_id
Next is the API key. Go to account overview and in the “API” section select “Go to developer hub”. Now select “Personal access tokens” and create a new token. Then, copy it and add to your env file:
AIRTABLE_API_KEY=your_token
Create movies view in Next.js
Basic layout with navigation
We have to prepare a layout to navigate between pages. In the src/components/layout directory create Layout.tsx. I’ve prepared a basic sticky navigation based on the Tailwind CSS documentation.
I moved the footer to another file just to make it more clear, so inside the layout directory create the file Footer.tsx.
Add Airtable library and setup
Earlier, we created environment variables. We want to use them and show movies from our database. The next step will be adding an Airtable library.
yarn add airtable
Now we have to add a little setup so we can connect to our database. Create src/services/airtableClient.ts and put the following code inside. Note that we are using environment variables here.
Fetch the recommended movies
It's time to use the previously prepared client. But before that, let’s add interface movieDto to have proper types everywhere. Create a movie.dto.ts file inside src/interfaces/movies and put the movie attributes.
We want to only show recommended movies on the homepage (those that have 3 likes or more). The idea is, to get some amount of records from the “movies” table, sort them and filter by the number of likes.
Let’s modify the application homepage to show recommended movies. We will use the getStaticProps method. This will be done in the project build phase. We would like to fetch records from our Airtable database.
As you can see, we return some props and movies, from the getStaticProps method. Now we would like to pass this prop to our component and render the movies list.
I’ve prepared a basic card component from the Tailwind docs with the images from SVG Repo. You can modify it as you want or skip this and show only the movie titles.
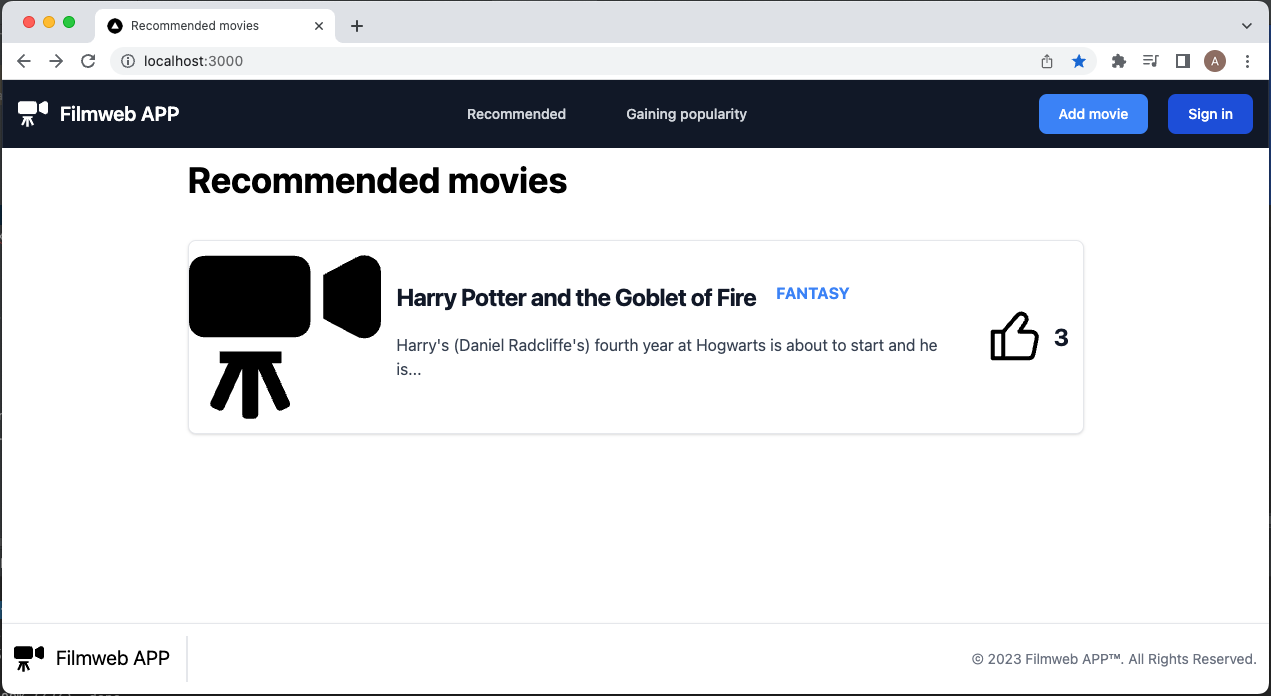
Let’s start an application and see how it works and looks. You should see something like below:
Looks pretty good. But… Function getStaticProps will be executed only once when we generate static subpages for our project. When we add new movies, we won't see them until the project is rebuilt. To avoid that we can combine static page generation on the server side with fetching new movies on the client side. The user doesn’t have to wait for anything to show (static generation) and has everything up to date (with fetching new movies).
To do that, we need a simple backend. NExt.js will treat as a backend every file that is inside /pages/API - it’s called API Routes. Let’s create index.ts inside /src/pages/API. Right now we will only use GET requests and return 5 recommended movies
We will use that endpoint to get recommended movies on the client side dynamically. Basically, after someone opens our page, we want to show statically generated data but also we would like to fetch new movies to keep everything up to date. We have to install one more library called SWR.
yarn add swr
Let’s use the SWR hook. The first param is the key, url to our API endpoint, next is a function responsible for making requests and last is configuration (passing default data, etc.). The fetcher function can be declared in this file or exported from utils to make it more reusable.
After that, you can go to the Airtable database, add movies, change the number of likes, and check if you see an updated view after returning to the application.
Fetch movies gaining popularity
After we display recommended movies, but we would also like to show those movies that are gaining popularity. Inside /services/movies let’s add a file getGainingPopularityMovies.ts. It looks very similar to getting recommended movies but with different filtering and sorting.
Now we have to create a new page. Add gaining-popularity.tsx to /src/pages and copy their content from index.tsx. Next.js knows that everything inside the page's directory is used for routing. The only thing you have to remember is to properly name files (file name = route). Go to your browser and check if switching tabs work.
We have two tabs working but with the same content. Let’s modify moviesHandler - when we add a query “gainingPopularity”, the handler will return gaining popularity movies, and in the other case it will return recommended movies.
In gaining-popularity.tsx use getGainingPopularityMovies function instead of fetching recommended movies. What is more, we have to add a query toxi param.
Create a simple form to add a movie
Now, let's create a simple form so we can add new movies. Start by creating a form with a title, description, and category. Add a new.tsx file inside src/pages/movies. Our form will be available at route /movies/new.
After a movie is successfully created we will show information about its success on a separate screen. So basically we will redirect the user to the /movies/created route.
That’s the moment when we need to get our form working. Let’s start by adding a Zod library that will help us in validating the request on the backend side.
yarn add zod
Firstly, let’s add a schema for creating movie objects. We need data from the form - title, description, and category. Export also a type, we will use it in form view.
Next, let’s add createMovie.ts inside the src/services/movies directory and put a function that adds a new film to the database. We would like to pass 0 likes by default and validate movies based on the earlier created Zod schema.
We also have to modify our API handler a little bit so it won’t throw an exception on POST requests.
And it’s time to update the form component itself. Firstly, we need some ref so we could get data from the form. We would like different text on the button in case the form is being processed. We also want to show some errors from the backend below our button. The most important function is handleSubmit. Here we get data from the fields and make requests to our API. If the response is 200 we redirect the user to an earlier prepared page and in the other case we set an error message. You can move the fetch and error handling to a separate file and wrap it somehow to make it clearer.
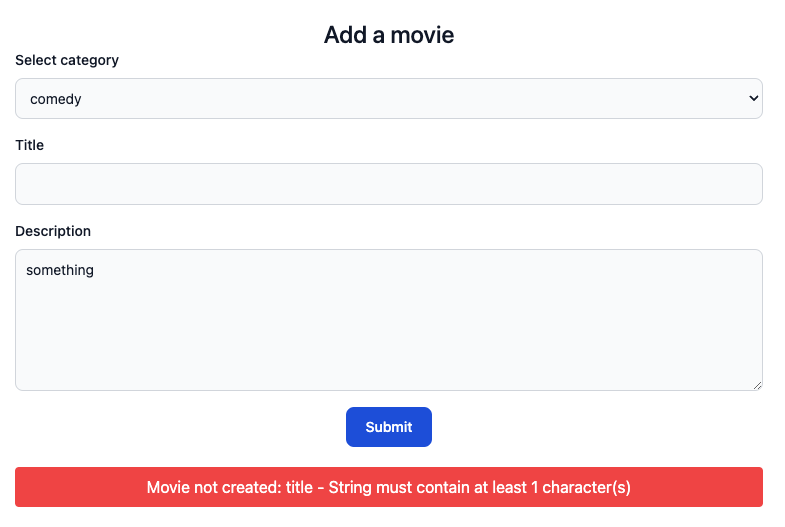
Now you can try adding a new movie by using the form. If you pass all the data it should redirect to /movies/created route. For testing backend validation you can add a space character in the title field. After pressing submit you should see an error like in the picture below.
Show movie details view
We have to add movie details view. In this case, we would like to redirect the user to /movies/1, movies/2, etc., where the number is the movie iD. Next.js will get parameters from the browser address bar, put them as file names and generate those files. It is called dynamic routing. Let’s create a file with the name [id].tsx with basic details view.
After redirecting to the movie details view we would like to fetch movie data from Airtable. Let’s add the getMovieById.ts file in the /src/services/movies directory and add there some code to select movies by iD.
We will also need a function to fetch movies without filtering. In the src/services/movies add one more file called getMovies.ts.
Go back to the [id].tsx and add methods that will generate pages and fetch movie data. We will use the getStaticPath function to determine what paths we want to generate. This method lists the movies and returns an array that will be used by Next.js to generate pages. Each element of the array has to contain params and inside them an attribute that will be inserted as a file name. In this case ‘id’ so Next.js will put it as [id]. We also have to set the fallback to true to dynamically generate pages. In getStaticPath we fetch 10 movies, ids from 1-10, users go to /movies/13 and we haven't generated this page yet. With the fallback flag, Next.js gives us the possibility to handle that situation.
Now we have a collection of pages to be generated, so we need another function to get details of each movie. Let’s add a getStaticProps function that will get an id from each generated path and based on that id it will call an API to get movie data. Then, we will return the movie as props and pass it to the MovieDetails component.
Go to your browser and see the details pages. Try to change the id in the URL to an id that hasn’t been returned when generating path collection. Error in the browser? Great. Because of the fallback flag, Next.js can generate that page but at that moment it doesn’t fetch the data.
Let’s fix it. The solution is to check if we have a fallback and show some loaders, text, etc. when the answer is yes. Next.js will have time to fetch data and inject them into components.
Summary
Congratulations! Your first application in Next.js is ready. It's a really simple app but there are a lot of new things to learn. You can add more tables, views, and techniques and develop this project to broaden your Next.js knowledge. In the next part, you can learn how to add simple user authentication to your project.
You can use Zod or any other library like Joi for easily validating data on the backend side of your application. You can use Tailwind or Material UI for styling just like in a React application.
When you have a project with many articles, details, etc. you can statically generate subpages and fetch data during the application build phase. Thanks to that, you can quickly show content to users and then fetch data one more time to have everything up to date.
Next.js should be definitely considered while starting a new frontend (or full stack) application!
Check out also
- Next.js - What Is It and Why Should We Use It? See the pros and cons of using Next.js to decide if it's the right fit for your next project.
- Build Search Interface with Algolia InstantSearch and Next.js: See how to create a search interface quickly with Algolia InstantSearch.
- React Native: How to Deploy Applications to Test and Not Go Crazy? Learn how to save yourself days of work when deploying your React Native app to test.
You may also like


We’re available for new projects.
